The Sun tried to come out on different occasions this month but was terribly hindered by the wintery conditions that kept butting in like winds and rain and sleet and hailstones.
I was tackling the Sun Room but this fact about the weather did not encourage me at all.
Though as I write this the back garden is brightly lit from the sun after another lot of hailstones yesterday.
The Sun Room
The Sun Room in itself did not need much work as there are not too many places for items to be kept.
But a few tips are always useful to keeping it organised.
1. Think about what you want in your Sun Room
2. Think about what you want to be able to take outside quickly
3. Think about how to make things HANDY!

The only cupboard we have in the Sun Room is in the TV unit and it is useful for storing light bulbs which I sorted and made a note of the types we did not have a spare one of.
Also in that cupboard we keep the 3D glasses that the kids got at various times just in case we need them to go see a 3D film sometime - which really is a very faint probability as Fred & I have not ever gone to a 3D film. Perhaps the kids should have each kept theirs for wherever they are?
Then the other main things in that cupboard are
This is a useful spot to keep these as the Sun Room opens out to the Patio and when the sun appears (for the short periods that happens here in Northern Ireland and let's face it we need to make the best opportunity as we can of those short periods of time) we can grab those things on the way out to sit on the Patio or Deck area.
The bulbs were already in a basket but these Sunny Day items were just lying in the cupboard so I got one of my favourite small Lakeland Storage Caddies for these items that we need for hopping out to sit in the sun.
You can see in the pictures above & below that it is ideal in size and that handle makes it so easy to grab.


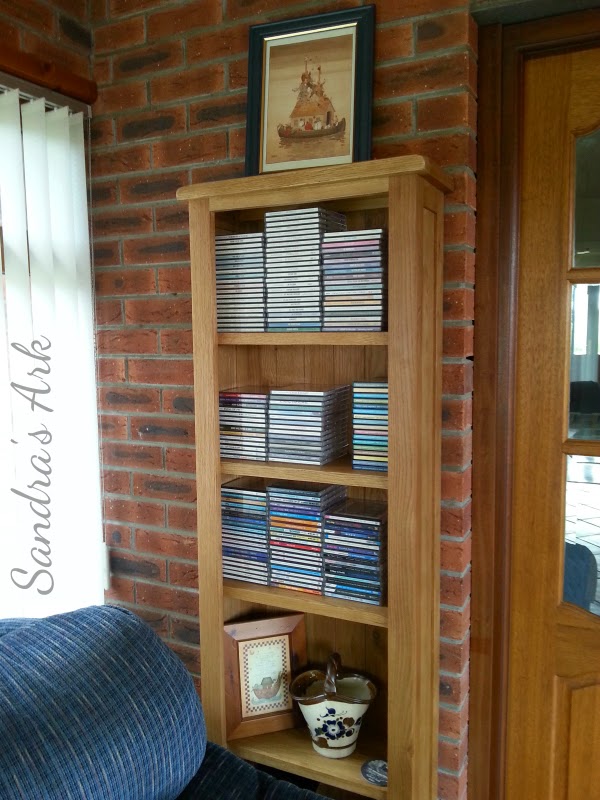
I have already written about how much I love Arks and pictures of Arks last year but now I had decided that some of these may go soon!!! but some will stay here in the Sun Room. Some of my favourite Ark pictures just match in nicely with the style and decor of the Sun Room.
Though as I write this the back garden is brightly lit from the sun after another lot of hailstones yesterday.

The Sun Room
The Sun Room in itself did not need much work as there are not too many places for items to be kept.
But a few tips are always useful to keeping it organised.
1. Think about what you want in your Sun Room
2. Think about what you want to be able to take outside quickly
3. Think about how to make things HANDY!
The only cupboard we have in the Sun Room is in the TV unit and it is useful for storing light bulbs which I sorted and made a note of the types we did not have a spare one of.
Also in that cupboard we keep the 3D glasses that the kids got at various times just in case we need them to go see a 3D film sometime - which really is a very faint probability as Fred & I have not ever gone to a 3D film. Perhaps the kids should have each kept theirs for wherever they are?
Then the other main things in that cupboard are
- a few puzzle magazines,
- Sun Tan lotion,
- Sun Tan wipes
- After Sun Wipes
- and some pairs of sunglasses.
This is a useful spot to keep these as the Sun Room opens out to the Patio and when the sun appears (for the short periods that happens here in Northern Ireland and let's face it we need to make the best opportunity as we can of those short periods of time) we can grab those things on the way out to sit on the Patio or Deck area.
The bulbs were already in a basket but these Sunny Day items were just lying in the cupboard so I got one of my favourite small Lakeland Storage Caddies for these items that we need for hopping out to sit in the sun.
You can see in the pictures above & below that it is ideal in size and that handle makes it so easy to grab.

What else might I want in that cupboard if I am going to use it daily during the next 5/6 months?
Well I decided to add
- a post it pad
- a notepad
- and a pen
because those are always useful things to have at hand instead of having to run to the study.
PLUS
there was still room for the three remotes that are needed in that room.
Lastly
There are two other things that I like to keep in the Sun Room but they will not be in that cupboard.

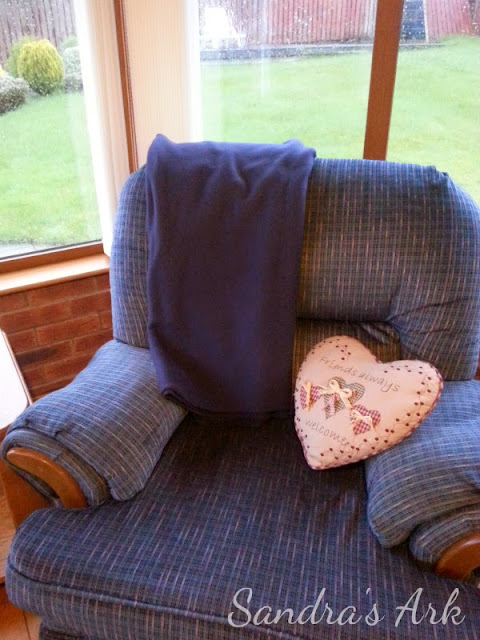
A navy fleecy throw
which is very handy if it gets a bit cooler in the evenings
or even if I just feel like curling up on the sofa to read .

The 4 cushions for the Patio Chairs
which I keep in a jute type bag pretty much out of sight behind the chair which sits beside the door out to the patio so that any time we are going out for breakfast we just grab a cushion on the way past.
With our climate the cushions never stay out!
I have already written about how much I love Arks and pictures of Arks last year but now I had decided that some of these may go soon!!! but some will stay here in the Sun Room. Some of my favourite Ark pictures just match in nicely with the style and decor of the Sun Room.

Here are two on the bookcase that holds most of our CDs
And here is another one above a window
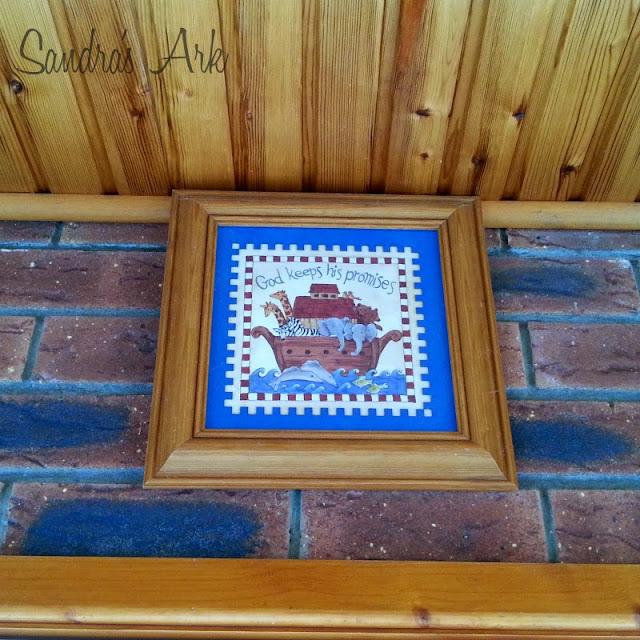
That does not mean that some other Ark decor items will not be found in other rooms in the house of course.


And here is another one above a window

That does not mean that some other Ark decor items will not be found in other rooms in the house of course.